Windows Chrome
- Open Chrome and go to your VideoCafe room and confirm that you are unable to start streaming with the camera and microphone enabled.
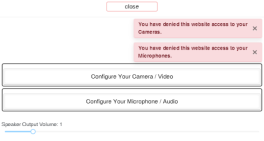
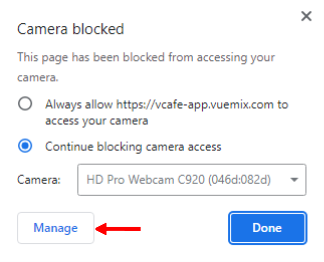
- Look on the right side of Chrome’s address bar for the Camera icon and click on it

- The Camera blocked pop-up window will appear. Click on the Manage button.
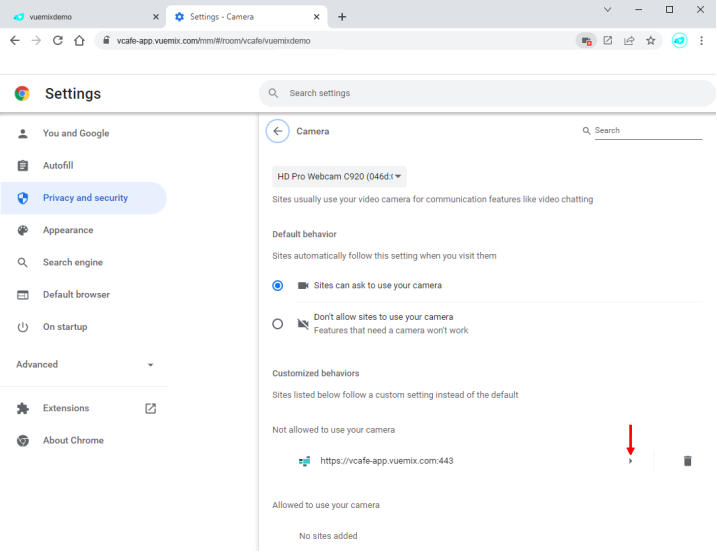
- Chrome’s “Privacy and Security” settings page for camera will appear. To easily change the settings for both the camera and the microphone, look for your VideoCafe app URL entry, which will contain “vuemix.com”, under the Customized Behaviors section’s “Not allowed to use your camera” list. In this example, the URL is https://vcafe-app.vuemix.com:443. Click on the triangle button ► to the right of the VideoCafe address.
- The Permissions list page appears. Note that in this example, both Camera and Microphone are blocked.
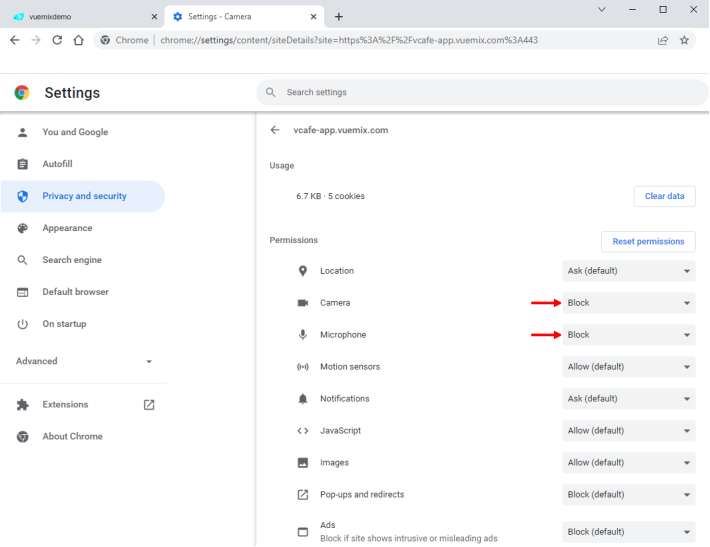
- Select the “Block” button for Camera, and change it to “Allow” in the drop-down list that appears.


- Select the “Block” button for Microphone, and change it to ”Allow” in the drop-down list that appears.


- Check that both Camera and Microphone are both now allowed.

- Close the “Privacy and Security” tab.
- Go back your VideoCafe tab, and refresh the page by clicking on the “Reload this Page” button.

- You may now start streaming in a room with both camera and microphone enabled.
MacOS Safari
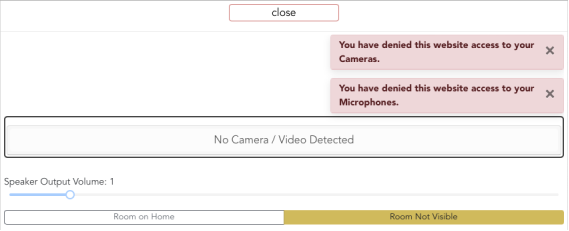
- Click on “Safari” in the top bar of your desktop, and select “Preferences…”
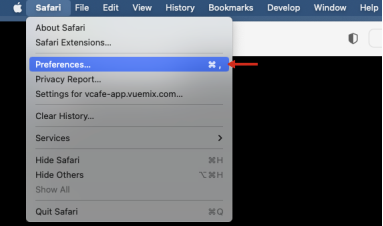
- In the Preferences window, select the “Websites” tab.
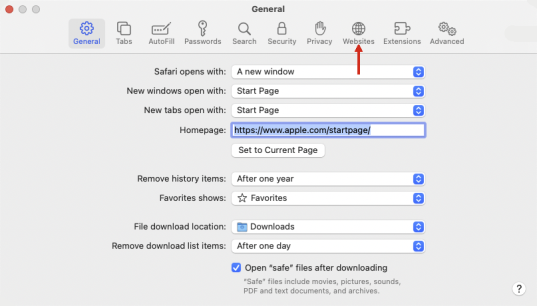
- In the Websites tab, select Camera in the column on the left.
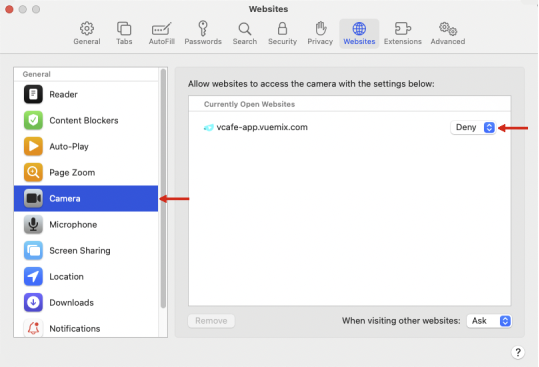
- Find the entry for the VideoCafe app URL entry, which will contain “vuemix.com”, and click on the “Deny” button to the right. Select “Allow” from the list that appears.
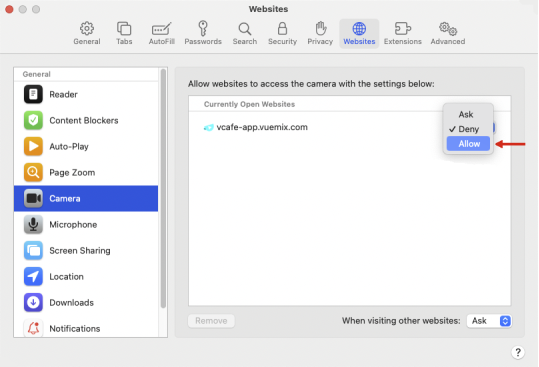
- Now, select Microphone in the left Column.
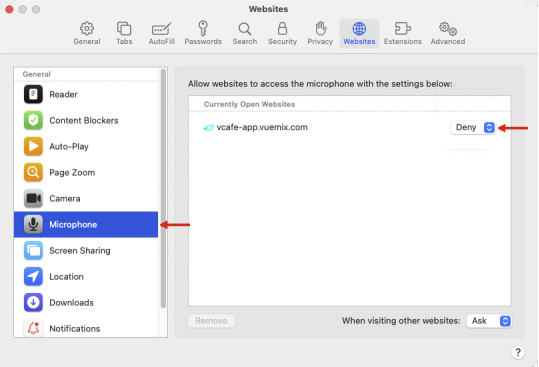
- Find the entry for vcafe-app.vuemix.com and click on the “Deny” button to the right. Select “Allow” from the list that appears.
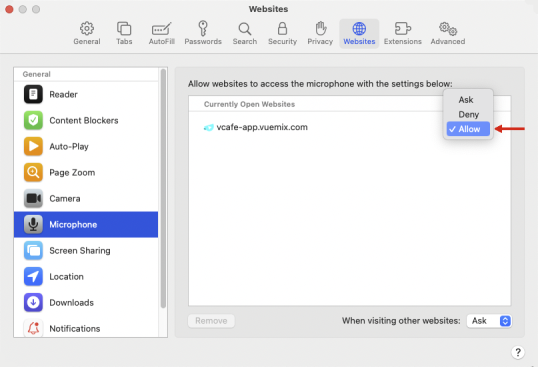
- You may close the Preferences window now.
- Go back your VideoCafe tab in Safari, and refresh the page.
![]()
- You may now start streaming in a room with both camera and microphone enabled.
MacOS Chrome
- Open Chrome and go to your VideoCafe room and confirm that you are unable to start streaming with the camera and microphone enabled.
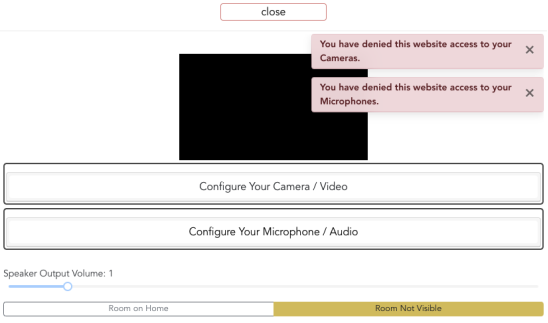
- Click on “Chrome” in the top bar of your desktop, and select “Preferences…”
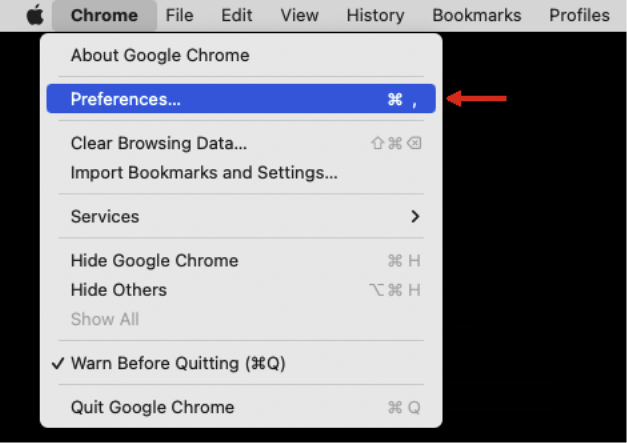
- Chrome’s Settings page will appear. Click on the Privacy and Security button.
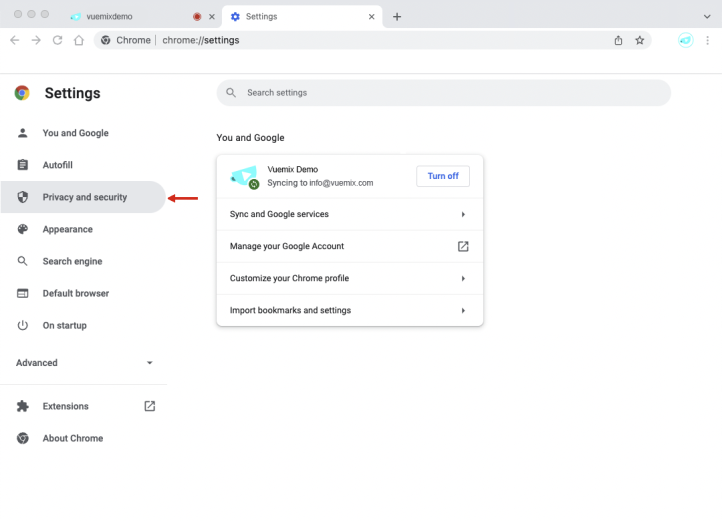
- The Privacy and Security page appears. Click on the triangle button ► for Site Settings.
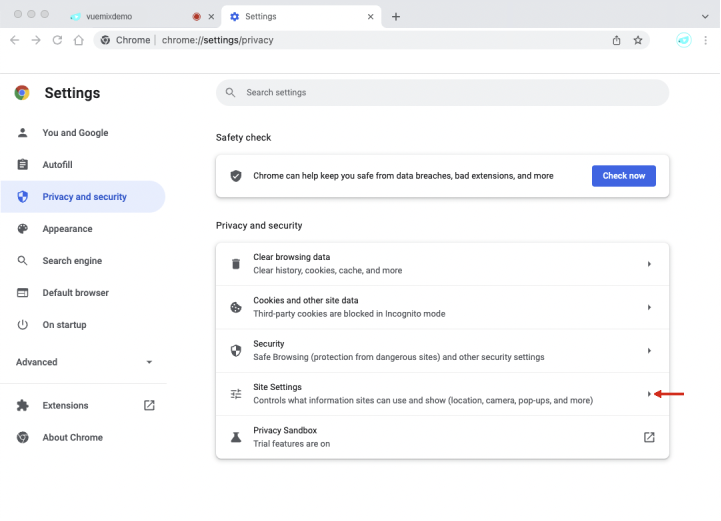
- The Site Settings page appears. Look in the center column for the “Permissions” heading. You will see “Camera” and “Microphone” settings below this.
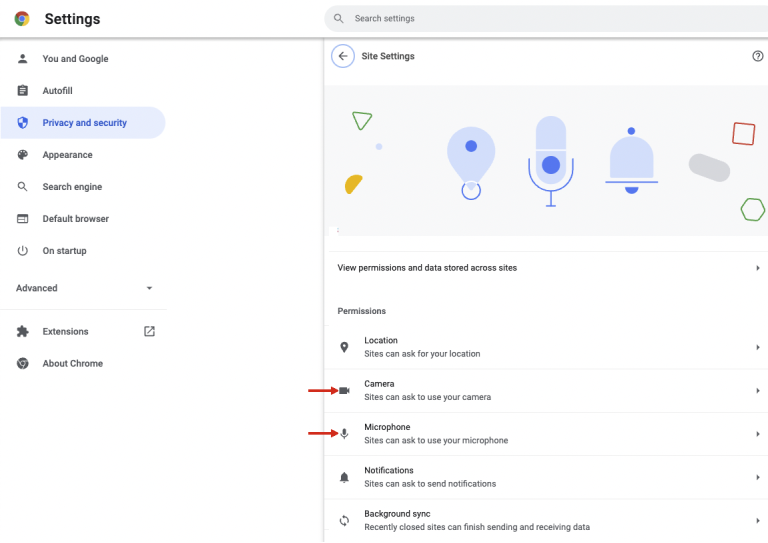
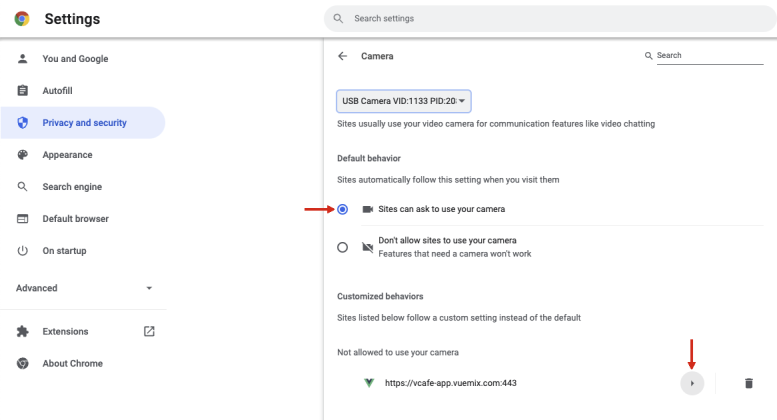
- Select “Camera”, and check that the “Default behavior” is set to “Sites can ask to use your camera”. Then, look for your VideoCafe app URL entry, which will contain “vuemix.com”, under the Customized Behaviors section’s “Not allowed to use your camera” list. In this example, the URL is https://vcafe-app.vuemix.com:443
-
Click on the triangle button
 to the right of the https://vcafe-app.vuemix.com:443 entry to see the detailed permissions list.
- Select the “Block” button for Camera, and change it to “Allow” in the drop-down list that appears.


- Select the “Block” button for Microphone, and change it to ”Allow” in the drop-down list that appears. You may close the “Privacy and Security” tab now.


- Check that both Camera and Microphone are now allowed.

- Close the “Privacy and Security” tab.
- Go back your VideoCafe tab, and reload the page by clicking on the “Reload this Page” button.

- You may now start streaming in a room with both camera and microphone enabled.
iOS Safari (iPad and iPhone)
-
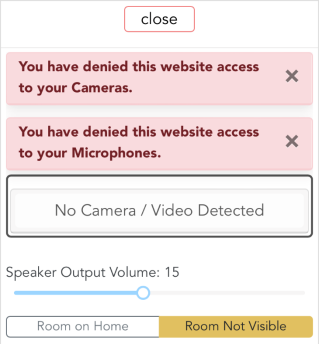
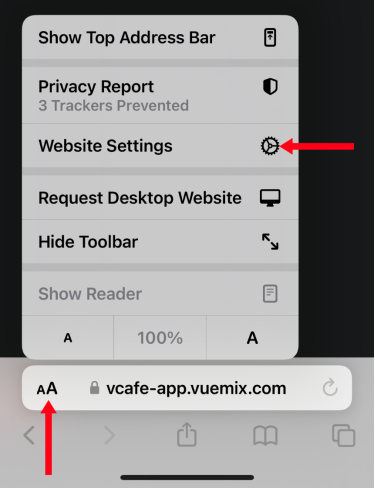
Click on the zoom settings button
 in the left of the URL entry box. The “Settings” pop-up page appears. Select Website Settings from the list.
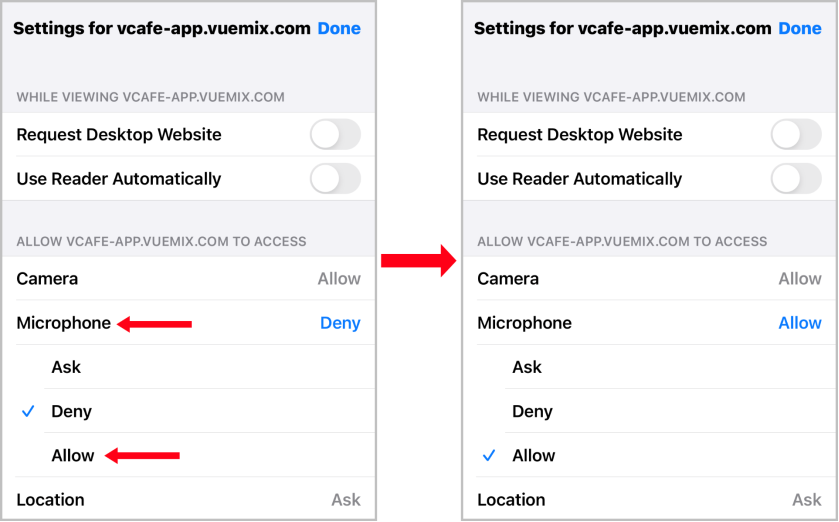
- Click on Camera to open a checklist of permissions for the Camera. Select (check) “Allow” on the Camera permissions list.
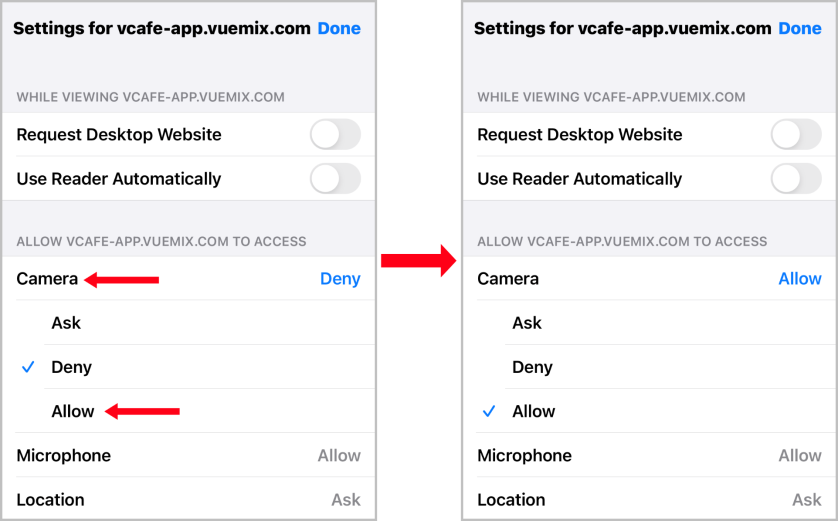
- Click on Microphone to open a checklist of permissions for the Microphone. Select (check) “Allow” on the Microphone permissions list.
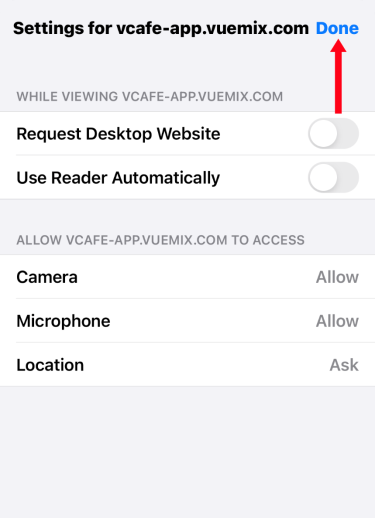
- Click on the Done button in the upper right corner of the Settings pop-up page.
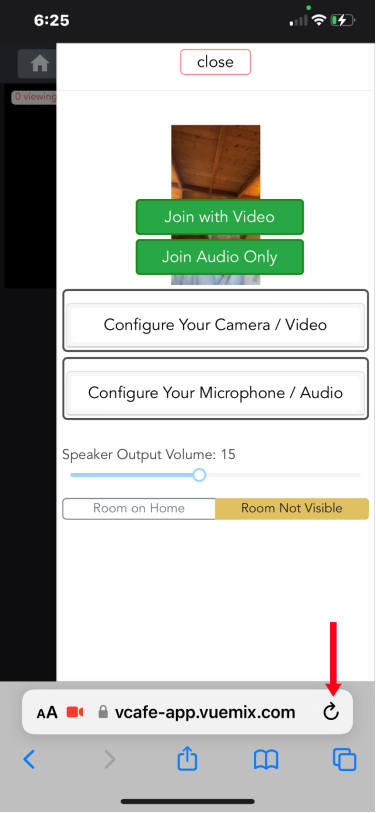
- Refresh the VideoCafe web page.
- You may now start streaming in a room with both camera and microphone enabled.
Android Chrome (Android phones running Android 12 and above)
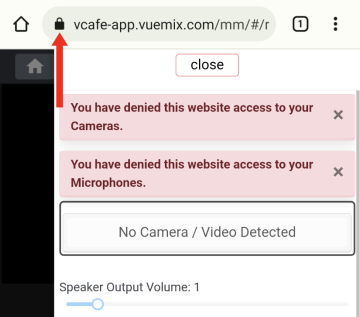
- Open Chrome and go to your VideoCafe room and confirm that you are unable to start streaming with the camera and microphone enabled.
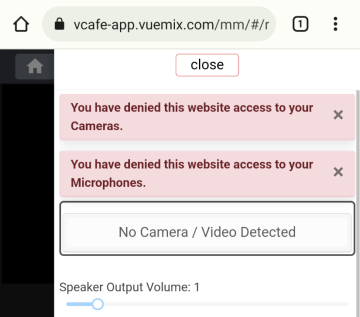
- Click on the “Lock” button in the left of the URL entry box. The “Settings” pop-up page appears.
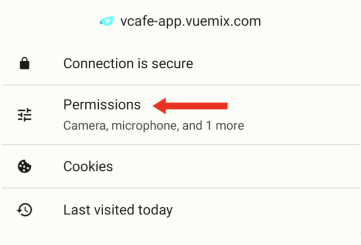
- Select “Permissions” from the Settings pop-up page.
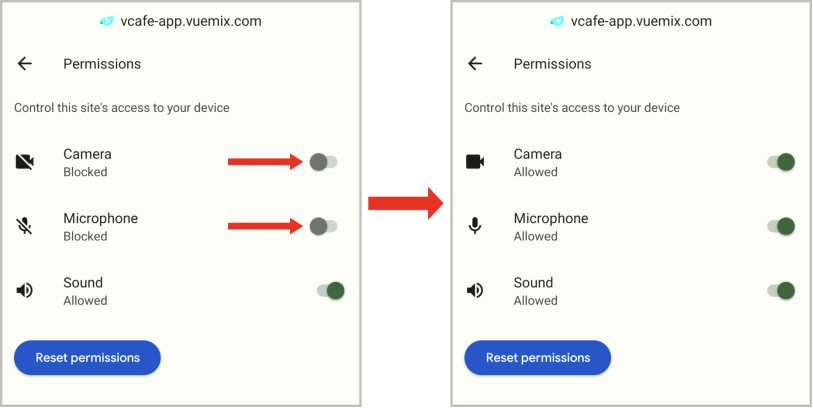
- On the Permissions page, move the sliders for Camera and Microphone to the right. You will see the stats message for each change from “Blocked” to “Allowed”.
-
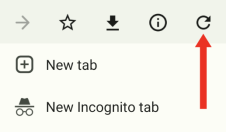
Click outside of the Permissions page to close the pop-up and return to Chrome. Click on the Customize and Control button


-
Refresh the VideoCafe web page by clicking on the Reload button
 .
.
- You may now start streaming in a room with both camera and microphone enabled.